How to Fix Image Upload Issue in WordPress
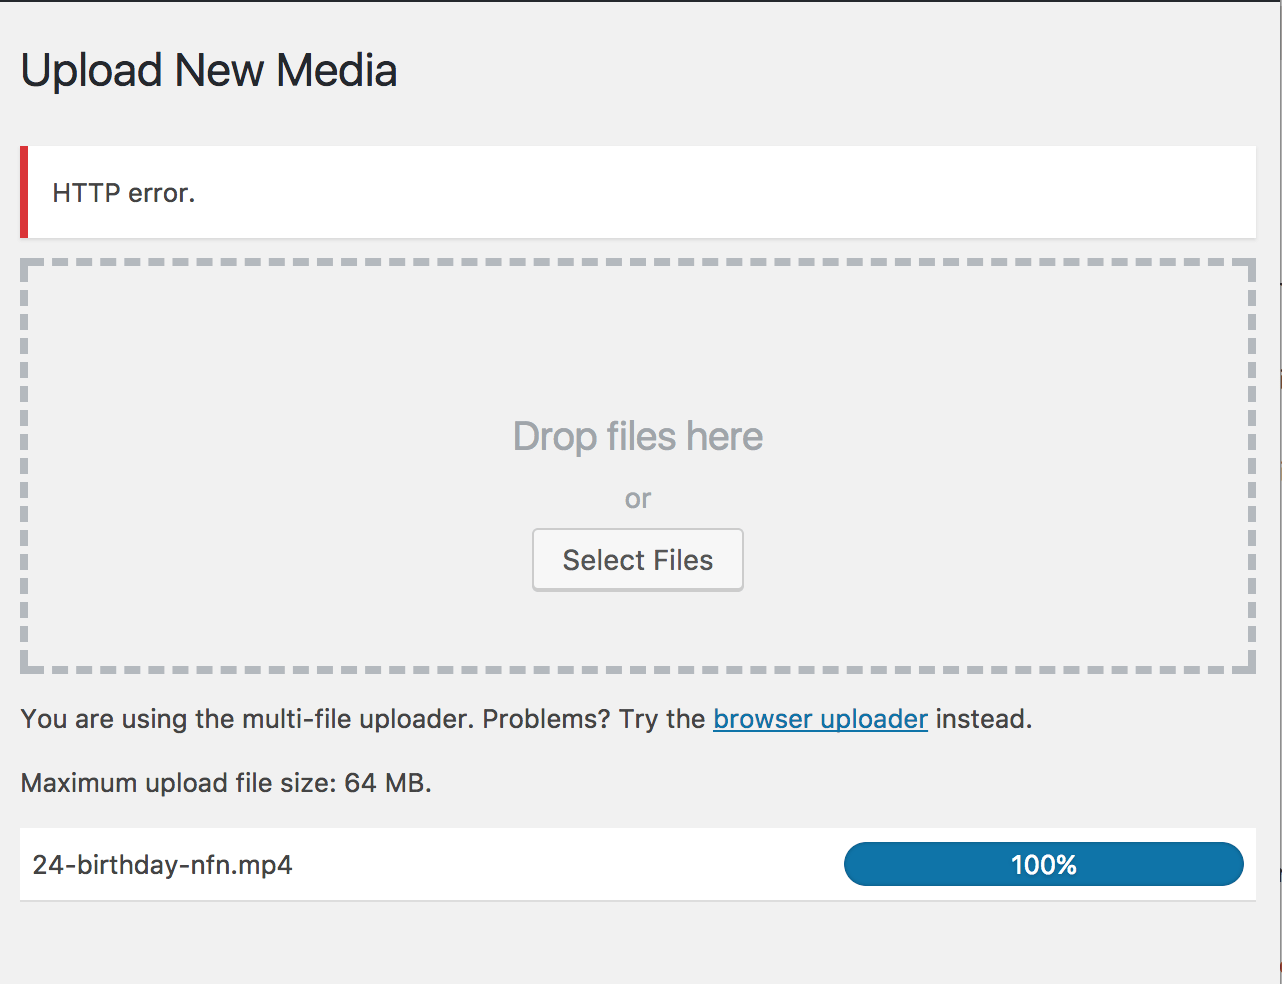
A few days ago, we made an article about how to fix common image issues in WordPress.In the meantime one of our WordPress users asked for help, He was facing a different problem & unable to solve that problem. When He tried to upload an image in word press then upload goes through media library as a broken file. Considering this issue, we will show how to fix image upload issue in word press.
Follow our instructions to solve the above problem of image fixing issue:
Many people face this problem mainly for selecting wrong file permission. If your upload directory is incorrect then WordPress won’t display even It won’t store your file. Check the correct file permission then try this solution.
Who changed the file Permissions?
There are many reasons to happen in this type of problem. First of all, Due to your web hosting provider made an upgrade for that reason your file permission to change. A hacker may be responsible for those changes while uploading a backdoor hack. In many cases, on the poorly configured hosting site, if anyone installs a theme or plugin from an unreliable source, the script ends up mistakenly changing file permissions for everyone. If any further problem if you face you can ask your hosting provider for support. Now we are showing how to solve that above-mentioned problem.
Change Permissions of Directories
- Connect to your website using FTP client then go-to wp-content directory. You can see the uploads folder.
- Right Click on upload folder and select file permissions.
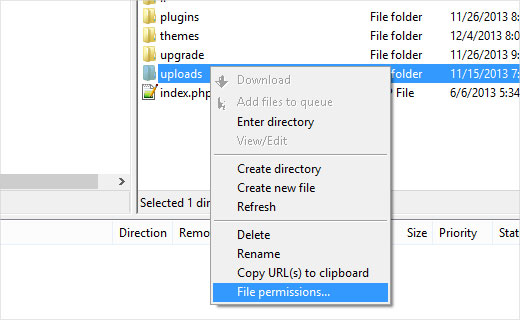
- A new dialogue box for file permissions will open.
- Enter 744 in the numeric value box and check the ‘Apply to directories only‘ box next to Recurse into subdirectories.
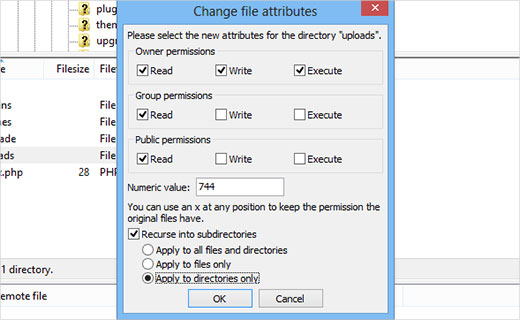
- Click OK button to apply these changes happen automatically (one important noted here if the 744 directory does not work then try 755 numeric value it might be work)
Change Permissions of the Files
- First, we need set permissions file in the uploads directory to that we are just clicking right on the uploads directory and select file permission.
- After we are check dialogue box change the numeric value to 644.
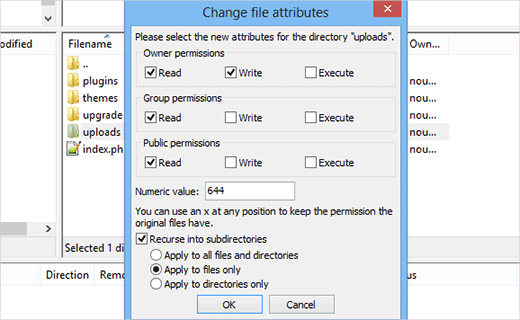
- Check the box next to Recurse into subdirectories.
- Check ‘Apply to files only‘ radio button and next click OK button to these changes
Filezilla will set the file permission for all the files, If it is done you can go your word press admin area and able to upload the image again. This article may help you to overcome those image uploading problem.